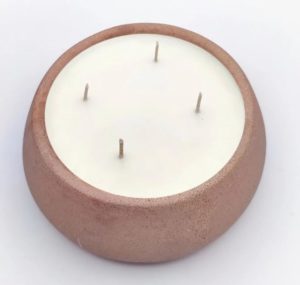
Are you looking to create a stunning Jesmonite candle holder that not only enhances your home decor but also serves as a unique conversation starter? You’ve come to the right place! In this comprehensive guide, we’ll take you through the intricate process of making your very own Jesmonite candle holder.
What is Jesmonite?
Before diving into the creation process, let’s start with the basics. Jesmonite is a versatile and eco-friendly material that’s gaining popularity in the world of design and crafts. It’s a composite material that combines natural raw materials with a water-based acrylic resin. The result is a strong, lightweight, and beautiful material that can be used for various creative projects.
Materials You’ll Need
-
Jesmonite Kit
To begin your journey to creating a Jesmonite candle holder, you’ll need a Jesmonite kit. These kits typically include the base material and any necessary additives.
-
Mixing Containers
You’ll require clean and sturdy containers for mixing the Jesmonite. It’s essential to use separate containers for each component to ensure accurate measurements.
-
Safety Gear
Safety first! Don’t forget to use safety gear, including gloves and goggles, to protect yourself from any potential splashes or fumes during the mixing process.
-
Candle Mold
Choose a candle mold that suits your style and the size of the candle you want to create. You can find various molds in craft stores or even make your own if you’re feeling adventurous.
-
Release Agent
A release agent is essential to ensure your Jesmonite candle holder doesn’t stick to the mold. Cooking spray or petroleum jelly can be used as a release agent.
-
Mixing Tools
You’ll need spatulas and mixing sticks to blend the Jesmonite components thoroughly.
The Step-by-Step Process
Step 1: Prepare Your Workspace
Before you start, ensure your workspace is clean and well-ventilated. Lay down protective coverings on your working surface, as Jesmonite can get messy.
Step 2: Measure and Mix
Follow the instructions in your Jesmonite kit to measure the appropriate amounts of powder and liquid. Make sure to wear your safety gear during this process. Mix the components thoroughly in separate containers.
Step 3: Add Pigments (Optional)
If you want to add color to your candle holder, now’s the time. You can use Jesmonite pigments to achieve the desired hue. Remember that a little goes a long way, so start with small amounts and add more as needed.
Step 4: Pour the Jesmonite
With your mixed Jesmonite ready, pour it into the prepared candle mold. Be sure to tap the mold gently to release any air bubbles that may have formed during the pouring.
Step 5: Demold
After allowing your Jesmonite candle holder to cure for the recommended time (usually 24 hours), carefully remove it from the mold. If you used a release agent, this should be a smooth process.
Step 6: Sand and Finish
To achieve a polished and professional look, you can sand your candle holder gently. Start with a coarse grit sandpaper and gradually move to finer grits for a smooth finish. Feel free to get creative and add unique textures or designs.
Step 7: Add a Candle
Once you’re satisfied with the appearance of your Jesmonite candle holder, place your favorite candle inside and light it up. Watch as the warm, flickering glow accentuates the beauty of your creation.
Tips for Success
- Experiment: Don’t be afraid to experiment with colors and designs. Jesmonite is incredibly versatile and forgiving, making it an excellent choice for artistic expression.
- Safety: Always prioritize safety. Follow the safety guidelines included in your Jesmonite kit and use safety gear without exception.
- Curing Time: Ensure you allow your Jesmonite candle holder to cure for the recommended time to achieve the best results.
Also, read:
Conclusion
Crafting your Jesmonite candle holder is a rewarding and creative process. With the right materials, attention to detail, and a dash of artistic flair, you can create a unique piece of art that enhances your living space. Remember to follow safety precautions, experiment with designs, and enjoy the journey of making something beautiful with Jesmonite.


